Monday, May 26, 2008

My Most Used Command!

I have a bunch of 2.5" HDD's that I used to 'ferry' data back an forth between my laptop and various computers. I have not taken the time to setup a file share on my Windows box and like most people I have a wife, who would devorce me if I started spending all our disposable income on FIle Servers, Web Servers, Firewalls, a DVR and a T1 line... trust me I've asked!

Anyway, a while ago I noticed that my laptop would not mount one of my HDD's after I unplugged it from my windows box. This drove me crazy for hours... I could not find any easy way to mount the drive and all the suggestions I did find online were fstab hacks.

Basically when you unplug a drive from windows, it locks the drive or marks the drive as inuse. (To get around this, you need to open the small green arrow hardware icon and then stop the drive and then unplug the device). So when ubuntu tries to mount this drive it sees it as being locked or in use and you get an error like so:
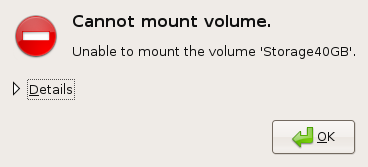

In order to get this drive to mount you must do the following. First create a directory in the /media directory (I called mine 'usb')

sudo mkdir /media/usb

Now you can 'force mount' the drive using the option flag and force command

sudo mount /dev/sdb1 /media/usb -o force

You will need to change the device name, mine is usually sdb1. Once you are done, you will need to unmount the drive. Now since we did this via the command line, you will need to issue the following command to unmount the drive via the command line as well.

sudo umount /dev/sdb1

That's it! I use these commands on a daily basis, I guess I'm a creature of habit and dont' really want to take the time to find an automated way to do this. Ussually if I can remember or I'm not in a hurry I'll eject the drive from windows first. Good Luck!

Ubuntu 8.04 Hardy Heron Upgrade...

So here is the first part of my upgrade process. I am still compiling the sources and commands, but this is the very basic steps for my D630 install.
  • Backed up all Files to external Drive
I only have a CD burner on my laptop, so I tend to use some external 2.5" HDD's that I've collected over the years. I copied all the documents, movies, music, downloads... basically anything under the /home/*username* folder.
  • Clean install of Hardy Heron
I decided to use the 64 bit version, hoping that I was not going to experience any issues. When the 7.10 release came out, I could not get GRUB to load the OS. After a few hours fixing that problem, Ubuntu kept crashing and I gave up and loaded the 32bit version and did not have any issues (that is until my wireless kept crashing on me... A story for another day)
  • Added other Sources
First, I'm a Google Homer, tried and true!!! I like their products, I religiously use their search and I 'Spread the Word' to others about using Google. So in the list of sources I have some google items listed along with Screenlets, Wine, AWN and some multimedia stuff that doesn't come with the standard distro.
    • sudo gedit /etc/apt/sources.list
Add the following (I would recommend at least the Backports)

#Hardy Backports
deb http://archive.ubuntu.com/ubuntu hardy-backports main universe multiverse restricted


#Google software repository http://www.google.com/linuxrepositories/apt.html
deb http://DL.Google.Com/linux/deb/ stable non-free


#“Illegal” multimedia stuff
wget http://packages.medibuntu.org/medibuntu-key.gpg -O- | sudo apt-key add -


#Google desktop
wget https://dl-ssl.google.com/linux/linux_signing_key.pub -O- | sudo apt-key add -
deb http://dl.google.com/linux/deb/ stable non-free

#Wine, official packages
wget -q http://wine.budgetdedicated.com/apt/387EE263.gpg -O- | sudo apt-key add -
deb http://wine.budgetdedicated.com/apt hardy main


#Screenlets
deb http://ppa.launchpad.net/gilir/ubuntu hardy main universe


#Avant-Window-Navigator
deb http://ppa.launchpad.net/awn-testing/ubuntu hardy main
  • Updated system
So after you add the above to your Sources list you will need to do an update, so Ubuntu will search for the changes and then install the additional packages. It will also allow you to go to the 'Add/Remove' programs and install any other packages that are not available in the standard disto.

    • sudo apt-get update

Saturday, May 10, 2008

Preview - Ubuntu AMD64 on a Dell Latitude D630

First I really like my laptop, the keyboard is comfortable to type on, I think it's fairly easy to upgrade (Memory, Bluetooth, HDD, Media Drive, WAN card (mobile broadband from say Verizon or Sprint)) I like the layout of the ports compared to the Lenovo laptops... Anyway, the last time I upgraded my system I had a hard time getting things up and running fully. First eye candy is very important to me and the Intel 965 chipset was a huge hurdle to overcome, then my intel wireless kept freaking out. So when the wifey is surfing www.thenest.com and the network manager keeps crashing and she has to reboot, makes a not so fun evening at home. I would say it took me a couple weeks to work out those issues, and after that it was pretty much smooth sailing... most of the time...

So, today I finally backed up my files (Mainly some movies & programs I had on my laptop) and installed the highly touted release Hardy Heron. To be more specific I installed the 64-Bit edition... There is a really good Pro vs. Con on installing the 64-Bit edition on the Ubuntu Forums, so I decided to at least give it a try.

It's just after Midnight CST here in Chicago and I've been up and running with my upgraded system for over 4 hours... Needless to say I'm EXTREMELY impressed with this release... I have compiled my notes and hopefully will have time soon to walk through the detailed steps, until then you'll just have to be satisfied with a screen shot.